

With a normal Loquiz game, you can track time on the header and points on the menu. So, how can you track them more aesthetically? Progress bars!
With the playgrounds, you can create yourself progress bars that will allow you to track time, score, and also walk distance. This is what I will explain to you in this article. I’ll also give you progress bar pictures. You can download them for free and reuse them for commercial uses if you have a Loquiz account.
First of all, what’s a progress bar?
Let’s explore each progress bar usage, and how we develop each of them:
Show time left
First of all, check this animation out.
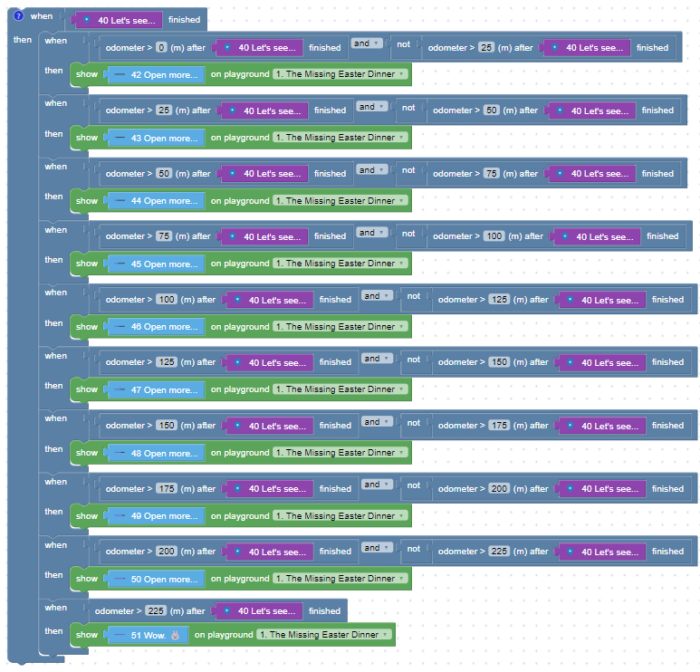
Nice, isn’t it? How do we program a progress bar that shows the remaining time? From the animation, please note that the timer starts after the task is finished, and not from the beginning of the game. The Loquiz logic will allow you to do that.
So here’s how I built the logic:
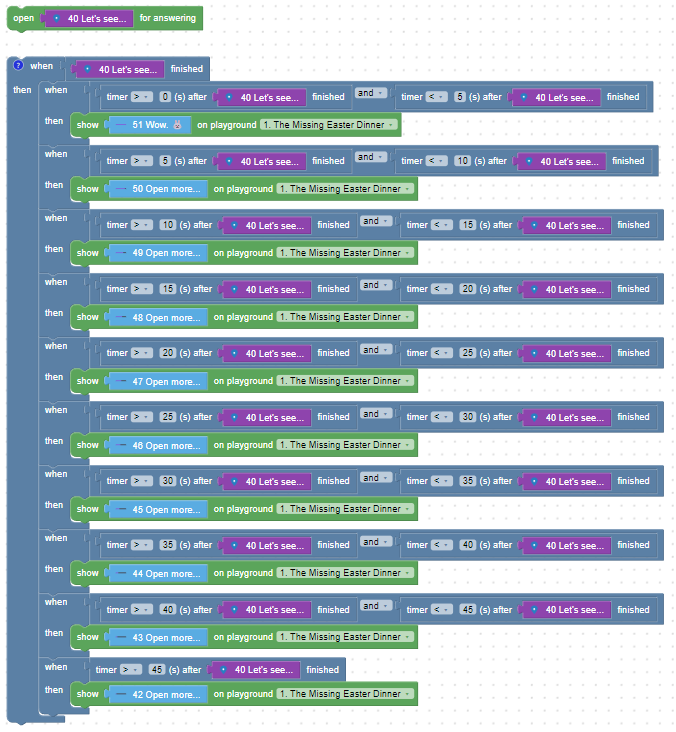
Let’s break it down:
First, this task will trigger the start of our progress bar.

Indeed, we only use the block “Timer >/< (s) after task 40 finished”
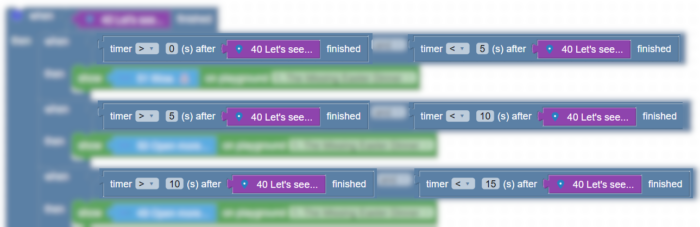
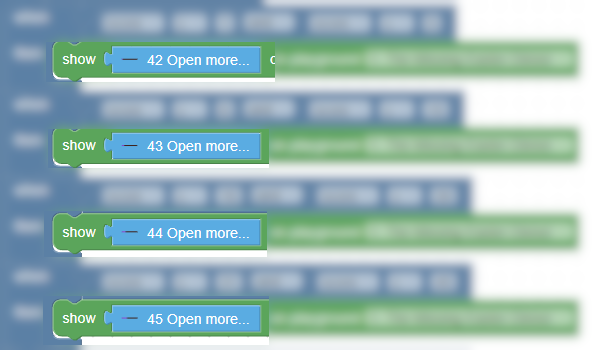
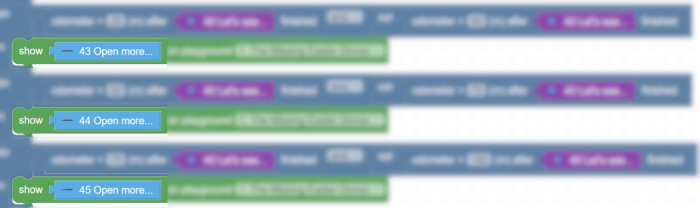
And if you notice: For every 5-second interval, we use a different task.

Then from 5 to 10 seconds, we show task 50 on the playground.
And then from 10 to 15 seconds, we show task 49 on the playground.
Here are the icons related to tasks 51, 50, and 49. If you click on the links in the previous sentence, you’ll see that each icon represents a smaller progress bar. By the way, feel free to use these progress bar pictures for your own game.

And to finish the time progress bar, we can use this logic. Once the 45 seconds have elapsed, let’s only show task 42. You can also add other logic telling the player that time is up.
Show the score
Time is not the only variable that we can measure. You also show the score with a progress bar.
So here’s the logic used for the score:
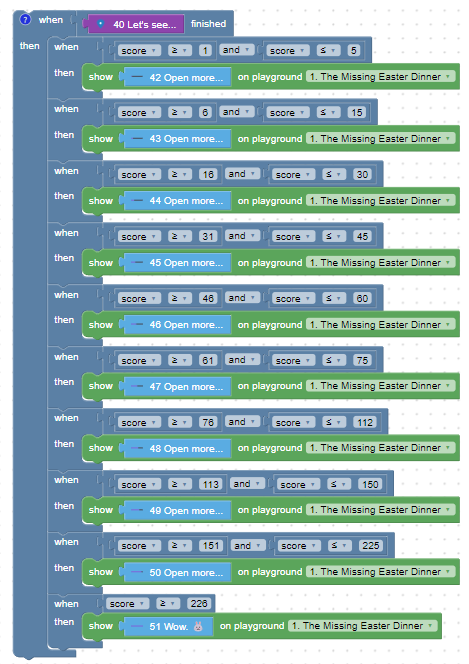
In this logic, we have intervals:

In each interval, a different task/icon will appear:
With this logic, you can simply make a progress bar that varies according to the score. The player won’t need to open the menu, they can just look at their playground. Nice, isn’t it?
Show the walking distance
You can also show what distance did the player walk.
As previously, we reason in terms of intervals. For each interval of walking, we make a different progress bar picture appear.

Note the usage of the block “not”.
Since we do not have “Odometer < (m) after task finished”, we can simply have the same logic by having “Not – Odometer > (m) after task finished”.
Same as previously, we make different tasks appear on the playground depending on the walking distance.
Get these logics into your Loquiz account
Would you like to get these 3 sets of logic? Contact me and send me your account ID (you can find this by following these instructions). I’ll transfer a template that includes these 3 logic, so you won’t need to recreate all of this yourself.

Picture files of the progress bar
For your Loquiz game, feel free to use these progress bar picture files. You are allowed to edit them and use them commercially in your Loquiz game.
Here is the Google Drive link.
I hope that this tutorial was clear enough, for you to create progress bars in your Loquiz games!
If you need more assistance on how to set up a progress bar in your Loquiz game, you can book a 30-minute demo with me 😊
Related stories

How to sell Loquiz tickets to one group, instead of one person? Use the ticketing scope. It will let you...
Warmer seasons are coming, and there will be more and more outdoor events: More team building or family games. What...

You’d like to create a tour in your own city, and you need a template? We’ve created the “Simple tour”...
Start free trial to bring your ideas to life
Sign up and create games, tours, team events and educational content that captures peoples' attention
Start from the scratch or use templates to kickstart!
