In this tutorial you can find out how to create a Scavenger game where each team has its own preset route to follow.
We are going to create a game for 3 teams that we want to visit the same 5 checkpoints but in absolutely different order. In our scenario, the teams will have following routes:
TEAM A: 1, 2, 3, 4, 5(F).
TEAM B: 2, 4, 1, 3, 5(F)
TEAM C: 3, 1, 4, 2, 5(F)
First, choose the Scavenger as a game type. Then lets put the game together for the first team.
Add tasks and assign them locations. We added 4 tasks into the game for the first team to visit. We also created the special finish task which is the same for all teams. We are using tasks that are not location specific, so we need to assign locations to tasks.
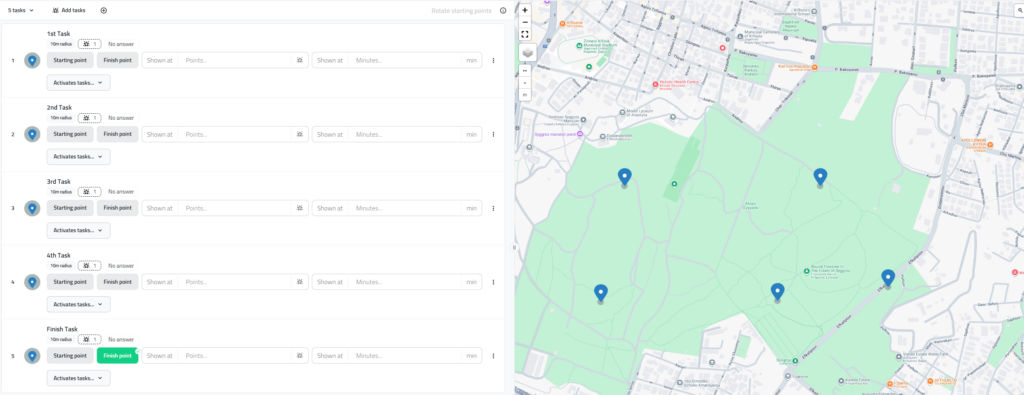
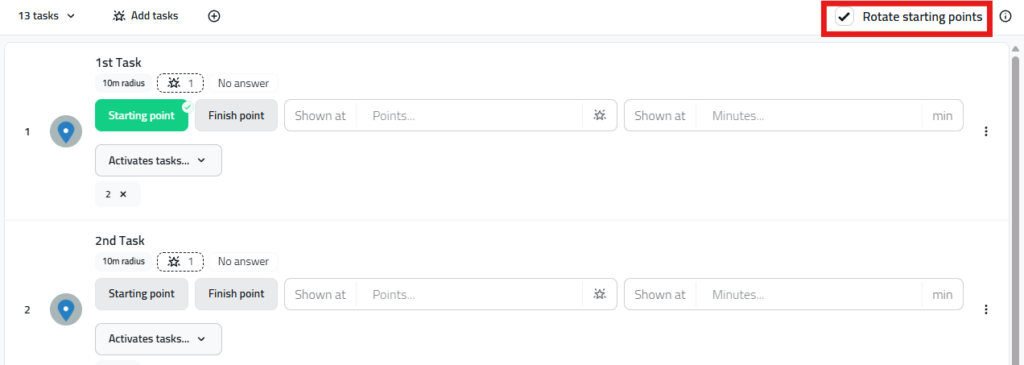
Now lets add some activation rules and mark start field. Activation rules will bring the tasks to the map for the first team. We need start field because we want the start location to be the first location shown on the map. Select it as Starting Point for Start. Then we want the 1st location to activate 2nd, 2nd activate 3rd and 3rd activate 4th, that activates 5th or finish. Add activation rules for each task (except finish).

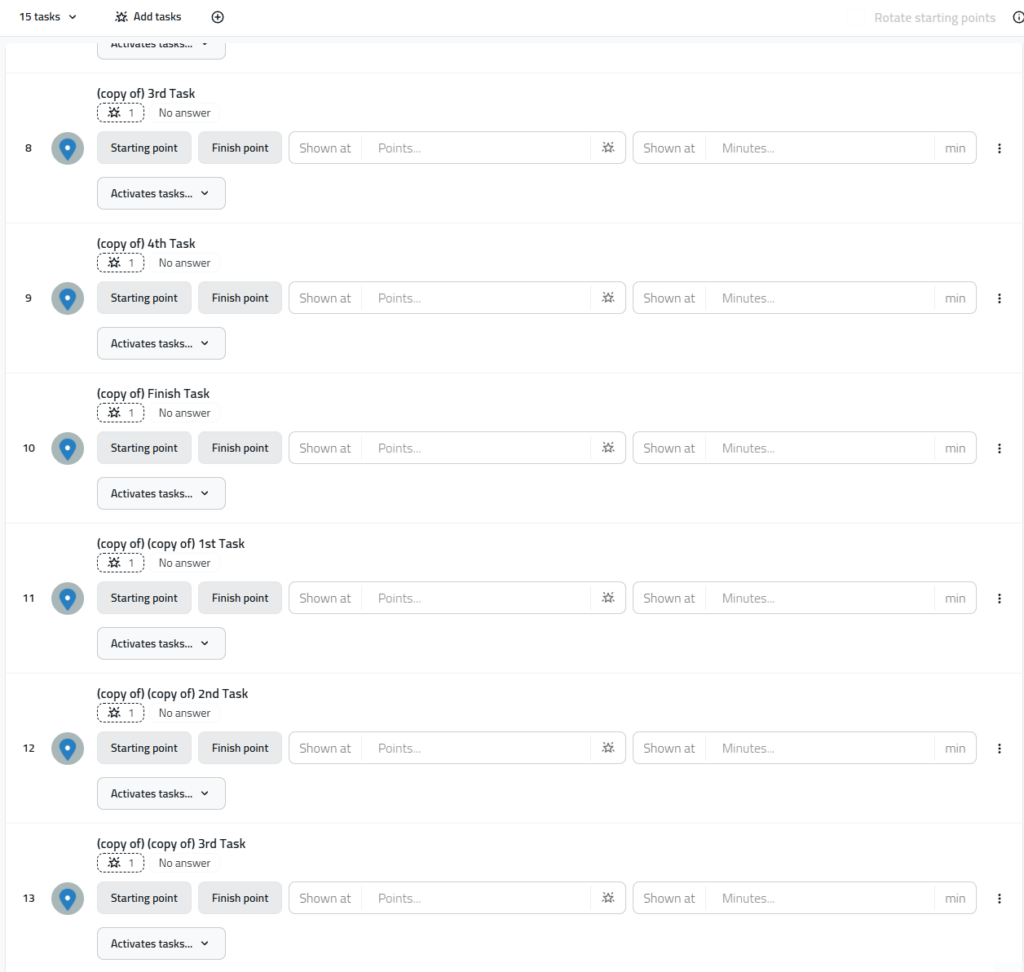
We are done with the first team. Let’s adjust the game for the other teams. Lets go back to the task screen and add some more tasks.
Create copies of the tasks. We created copies of the tasks we used for the first team. You can save the game here if you want, go back to your tasks library, choose the tasks and click create copies and you have copies of all of the chosen tasks. We have them ready so we will just add them to the game (you can rename later if you want to). In our game (copy of) stands for Team B and (copy of)(copy of) stands for TEAM C.
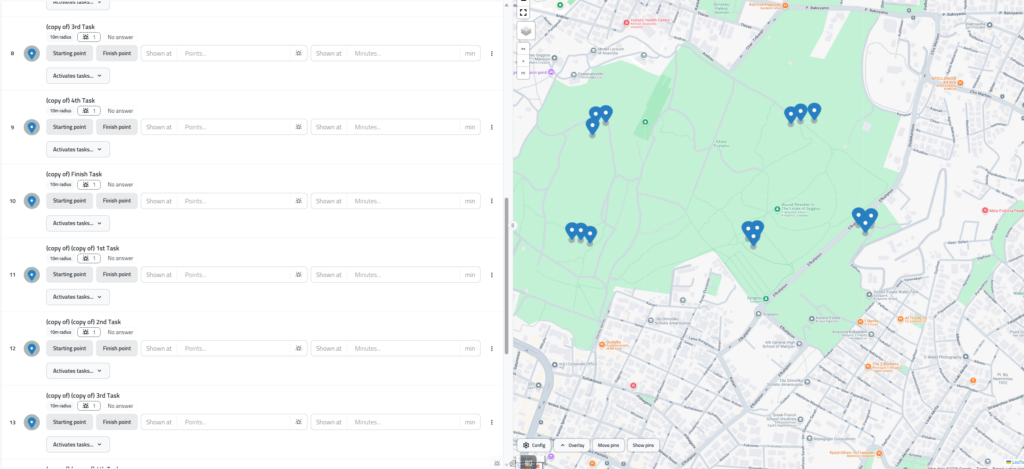
The next step is to assign the newly added tasks some locations. The trick here is to put the corresponding tasks right on top of each other (or close as we have done to show it clearly). Put them close and then move on top of each other.
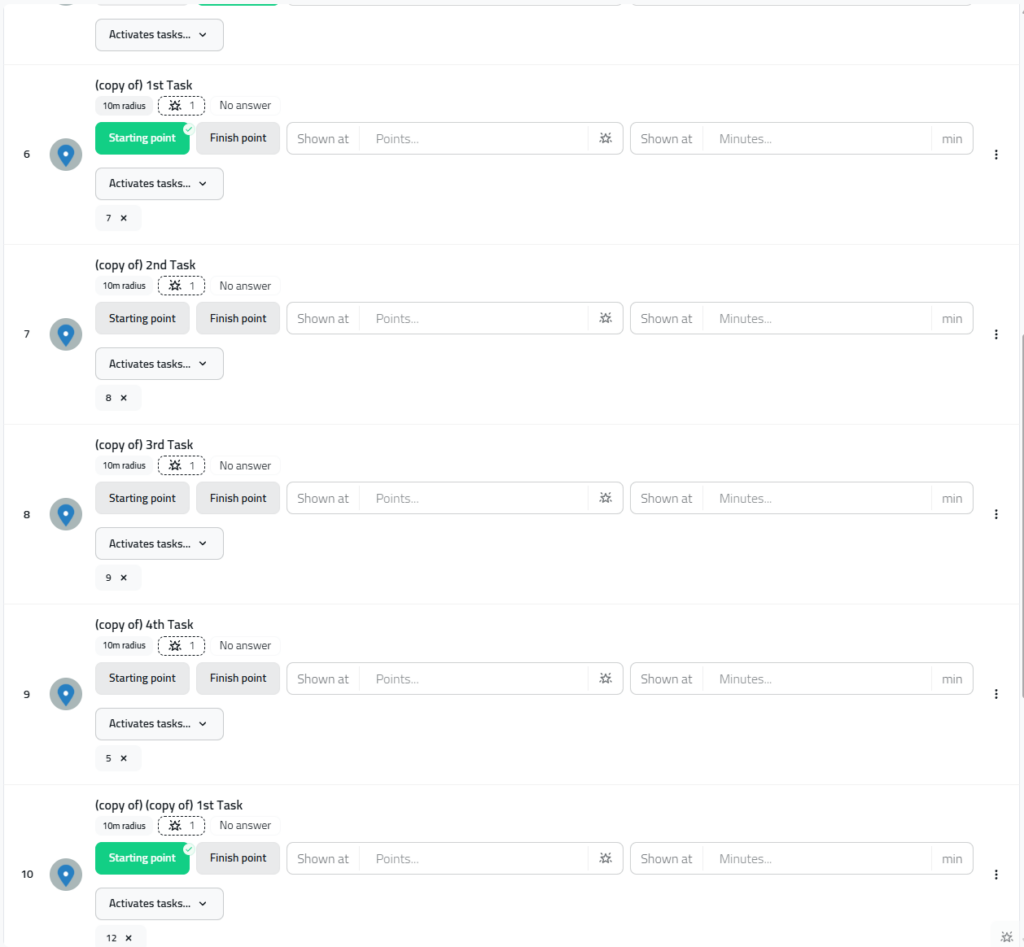
Now the tricky part. Let’s add the activation rules for the teams A and B.
Team B. Tasks from 6 to 9.
TEAM B route was: 2, 4, 1, 3, 5(F)
In our game it corresponds to start #7 (mark the S), then add rule behind #7 to open #9; #9 opens #6; #6 opens #8; #8 opens Finish (#5).
Now team C, tasks from 10 to 13.
TEAM C route was: 3, 1, 4, 2, 5(F)
So team C starts with #12 (mark it with S) and then make a rule behind #12 to open #10; #10 opens #13; #13 opens #11 and #11 opens Finish (#5)
This was the tricky part.
There is one thing still to do. Make finish field activate the Starting fields. So add a rules to location #5 (F) to open location #1; #7; #12 (start fields). The reason to do it is that we do not want other teams to see other starting points. Finish will not actually activate them but having a rule means they will not be opened when all the locations without the rules are appearing on a map.
Now you need to adjust one important detail. Check the tickbox near “Rotate starting fields”, so that each team only gets one starting field. And check if the start fields are correct.
Save the game and if you and we did everything right you should have a game that has 3 different routes (you can send more teams onto them if you want though, just start more devices) and will finish in the same place. You can modify the game so that only the first part of the game is on separate routes or the tasks are in different places naturally.