You have probably drawn at least one treasure map in your life. It might have even been for a corporate event or team building game. If not, then now is a good time to make one because you can add any map/image as a game’s treasure map in Loquiz.
This blog post will give an step-by-step overview how you can create your own unique map for an outdoor game and also how to add it to a game created with Loquiz. There are several ideas how to create a game map (i.e. hand draw or use historical or orienteering maps as base) but in this article we’ll cover the example you can make using image editing software.
- Choose the area in which you will be conducting the game. You can use Google maps or Open Street maps as a base. Take a screenshot of the map. Jing, Greenshot are one of my favourites but you can use the good old “Print screen” button on your keyboard. I chose a historical park area.
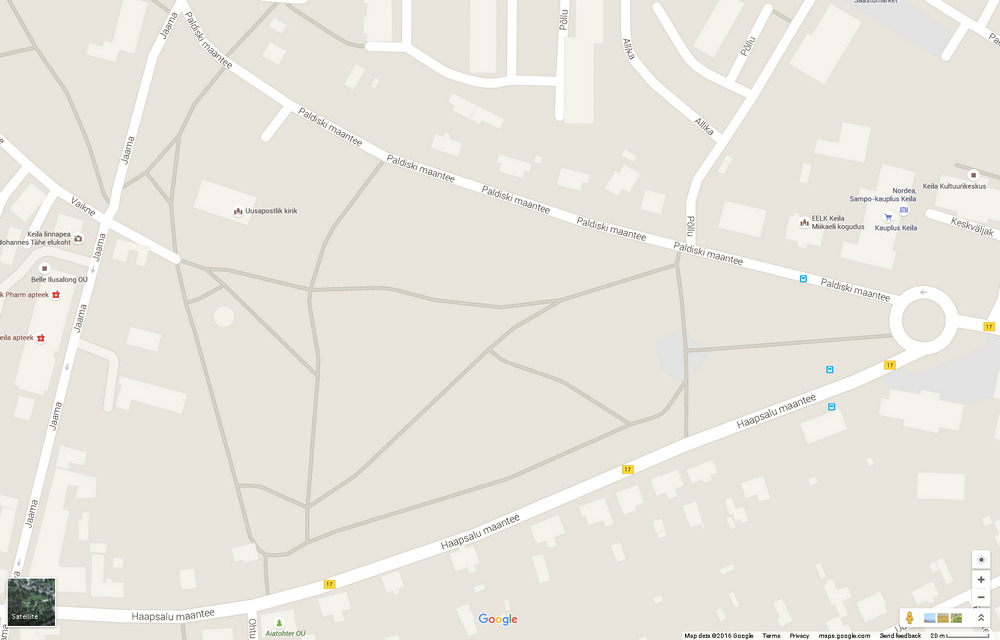
- Paste the image into image editing software. There are many out there, like picmonkey. For offline editing, the two most well known ones are: GIMP, and Adobe has made Photoshop CS2 available for free to everyone .
Many image viewing softwares, like Faststone ,also enable simple editing and simple effect filters. We are after the latter : ) - I opened up the image in Photoshop. First cropped the edges, then applied filters.
Main menu Filters > Artistic > “Poster edges”+ one of the following: “Colored pencil”or Brush strokes “Inked outlines” give a good impression of a hand-drawn image. As well, Sketch > “Chalk and charcoal”.
Stylize > “Glowing edges” on the other hand gives a total sci-fi look : ) - The next step was to play with colour. Main menu Image > Adjustments > Hue/Saturation. I was after brownish old-time look. Also did some adjusting of the contrast. And I had special map ready!
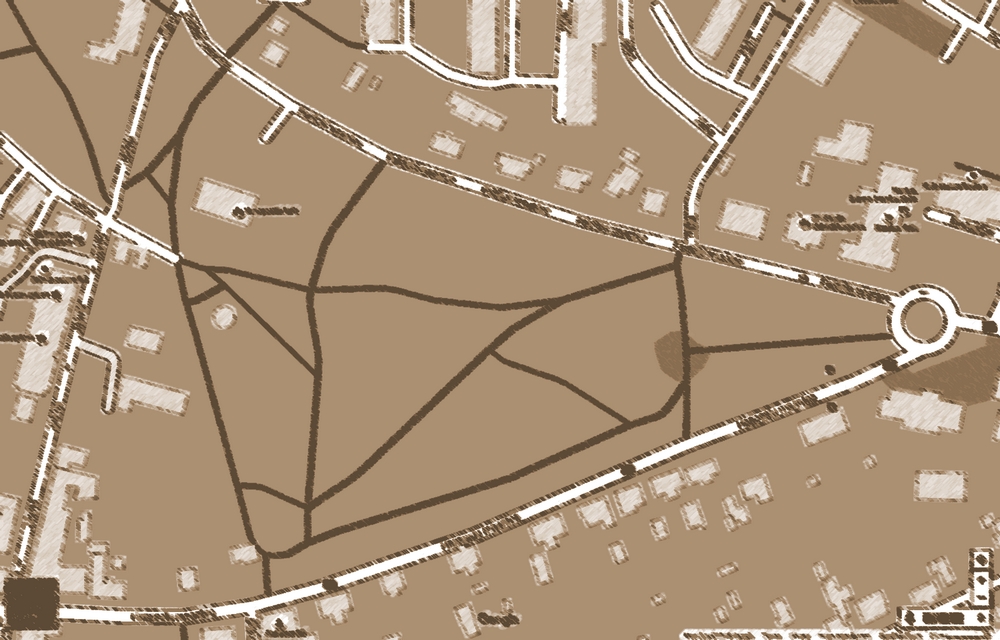 It is possible to add other elements as pictures of charachters to the image to go off of your pirate or other fantasy theme. But this time I needed just an “old look”.
 - Upload your map to a picture hosting site or to your own webpage.
- Login to Loquiz and start creating any outdoor game as you would normally. On the “Locations” screen, you can use “Picture Overlay”
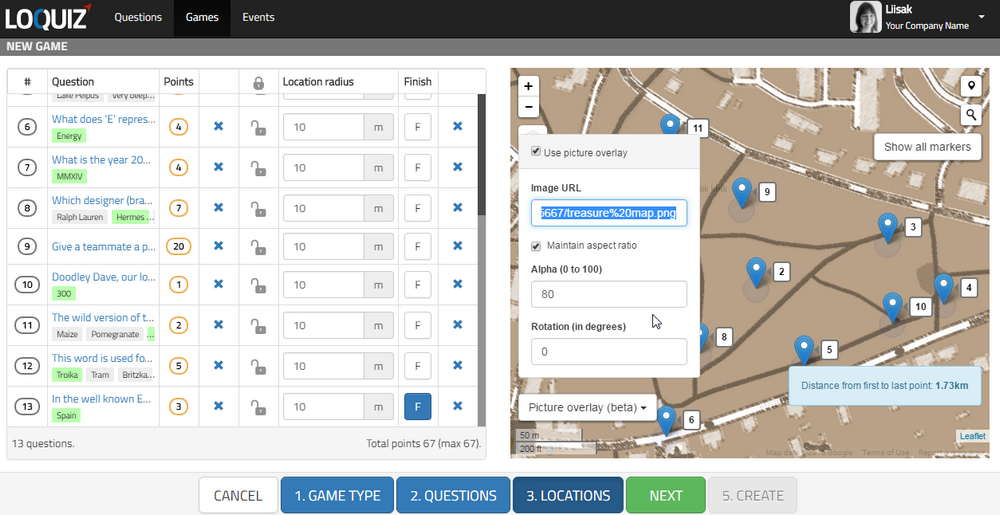
Checkmark “Use picture overlay”
Add the url where you host your image
Alpha sets transparency- you might want players to see some of the Google map glowing through.
To scale your map drag from the corners of the image
To move the map to make it overlap trails in the base map, use the arrow keys on your keyboard (works only when “Picture overlay (beta)” drop menu is open. - Complete building your game as normally and create an event.
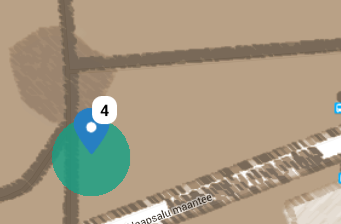
- Test how the map looks like in an smart device:
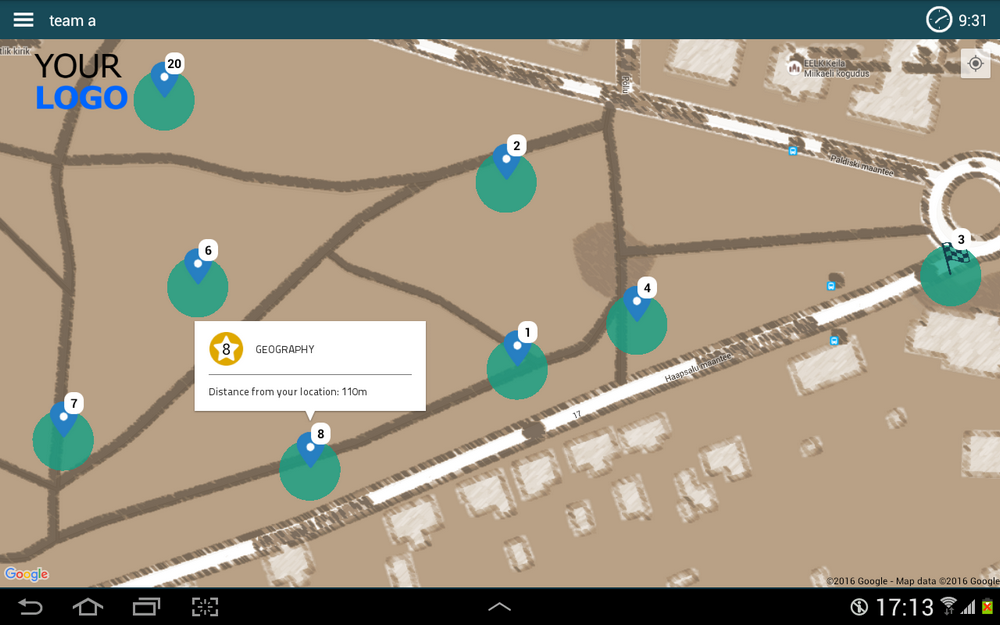
Hopefully this gave you some starter ideas how you can make your own unique looking maps and apply them in Loquiz. You are welcome to share your ideas in the facebook Loquiz users group or comments below.
Related stories

With your Loquiz game, you can add a list to simply display your tasks. It’s recommended for indoor games or...

The Loquiz creator allows you to have a map… But also a custom visual interface called “Playground“. This feature allows...

Do you live in a well-known city, and you’d like to offer tourists a mobile phone tour? They will appreciate...
Start free trial to bring your ideas to life
Sign up and create games, tours, team events and educational content that captures peoples' attention
Start from the scratch or use templates to kickstart!

