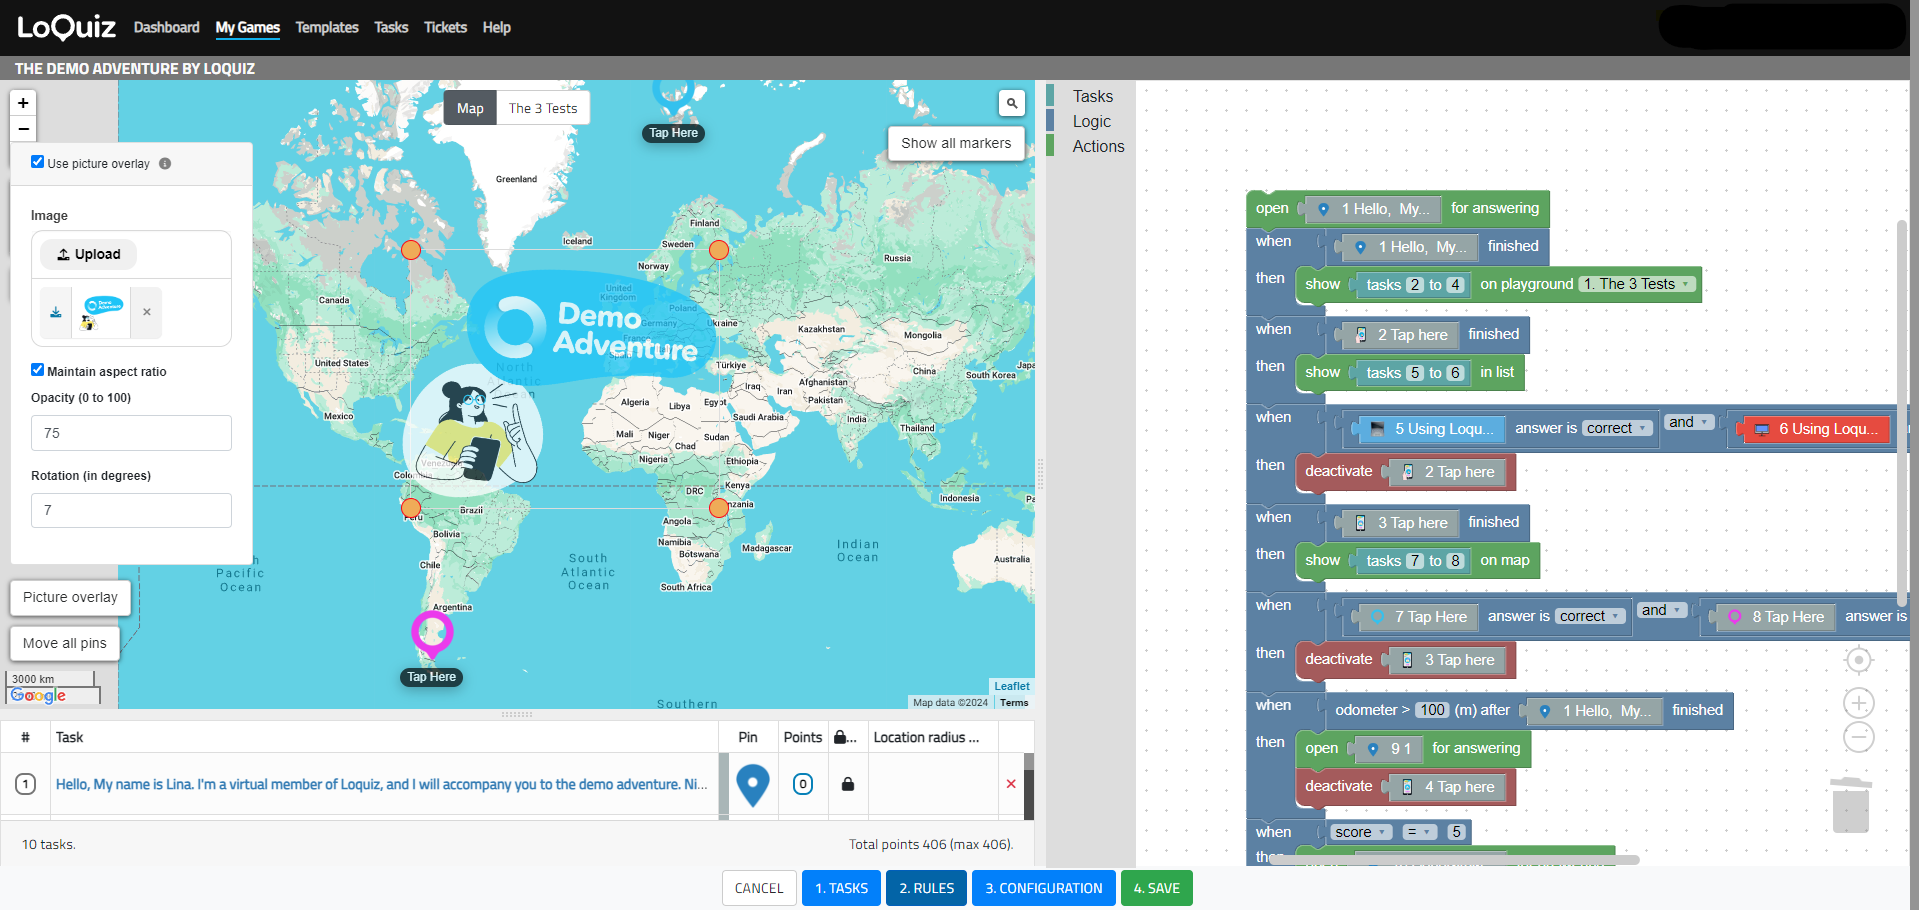
Loquiz allows users to add picture overlay onto the map in outdoor games. This picture can be a detailed map, drawing, tourist map, photo, sketch, icons etc. Read more to find out how to add and modify picture overlay.
Picture overlay can be added while creating/editing the game (see the screenshot). Just click on the button “Picture overlay” which you will find on the map.
Picture overlay settings:
- Use picture overlay – choose to use the picture overlay, untick to delete the map.
- Image – use upload from computer option and add an image (maximum 10 MB image). Make sure that the image is not too large, otherwise, you might face issues displaying it on the mobile device.
- Maintain aspect ratio – maintains the proportions of the image. This is chosen by default. Untick only if it is not possible to calibrate the map without changing aspect ratio. This will make calibrating the map very difficult.
- Alpha (0-100) – sets the transparency of the map. 0 is full transparency, 100 is opaque. Increasing transparency will help to calibrate the map. The same transparency is used in mobile device (it allows you to show the map under the photo layer if needed).
- Rotation in degrees – sets the map rotation. Use only in case if the map is not lined to the north.
How to adjust and move the picture overlay?
You can change the size and location of the picture overlay by moving (dragging) the corners of the picture.
Moving the image is also possible when using the keyboard’s arrow keys when picture overlay is active (does not work when Picture overlay dialogue is closed).
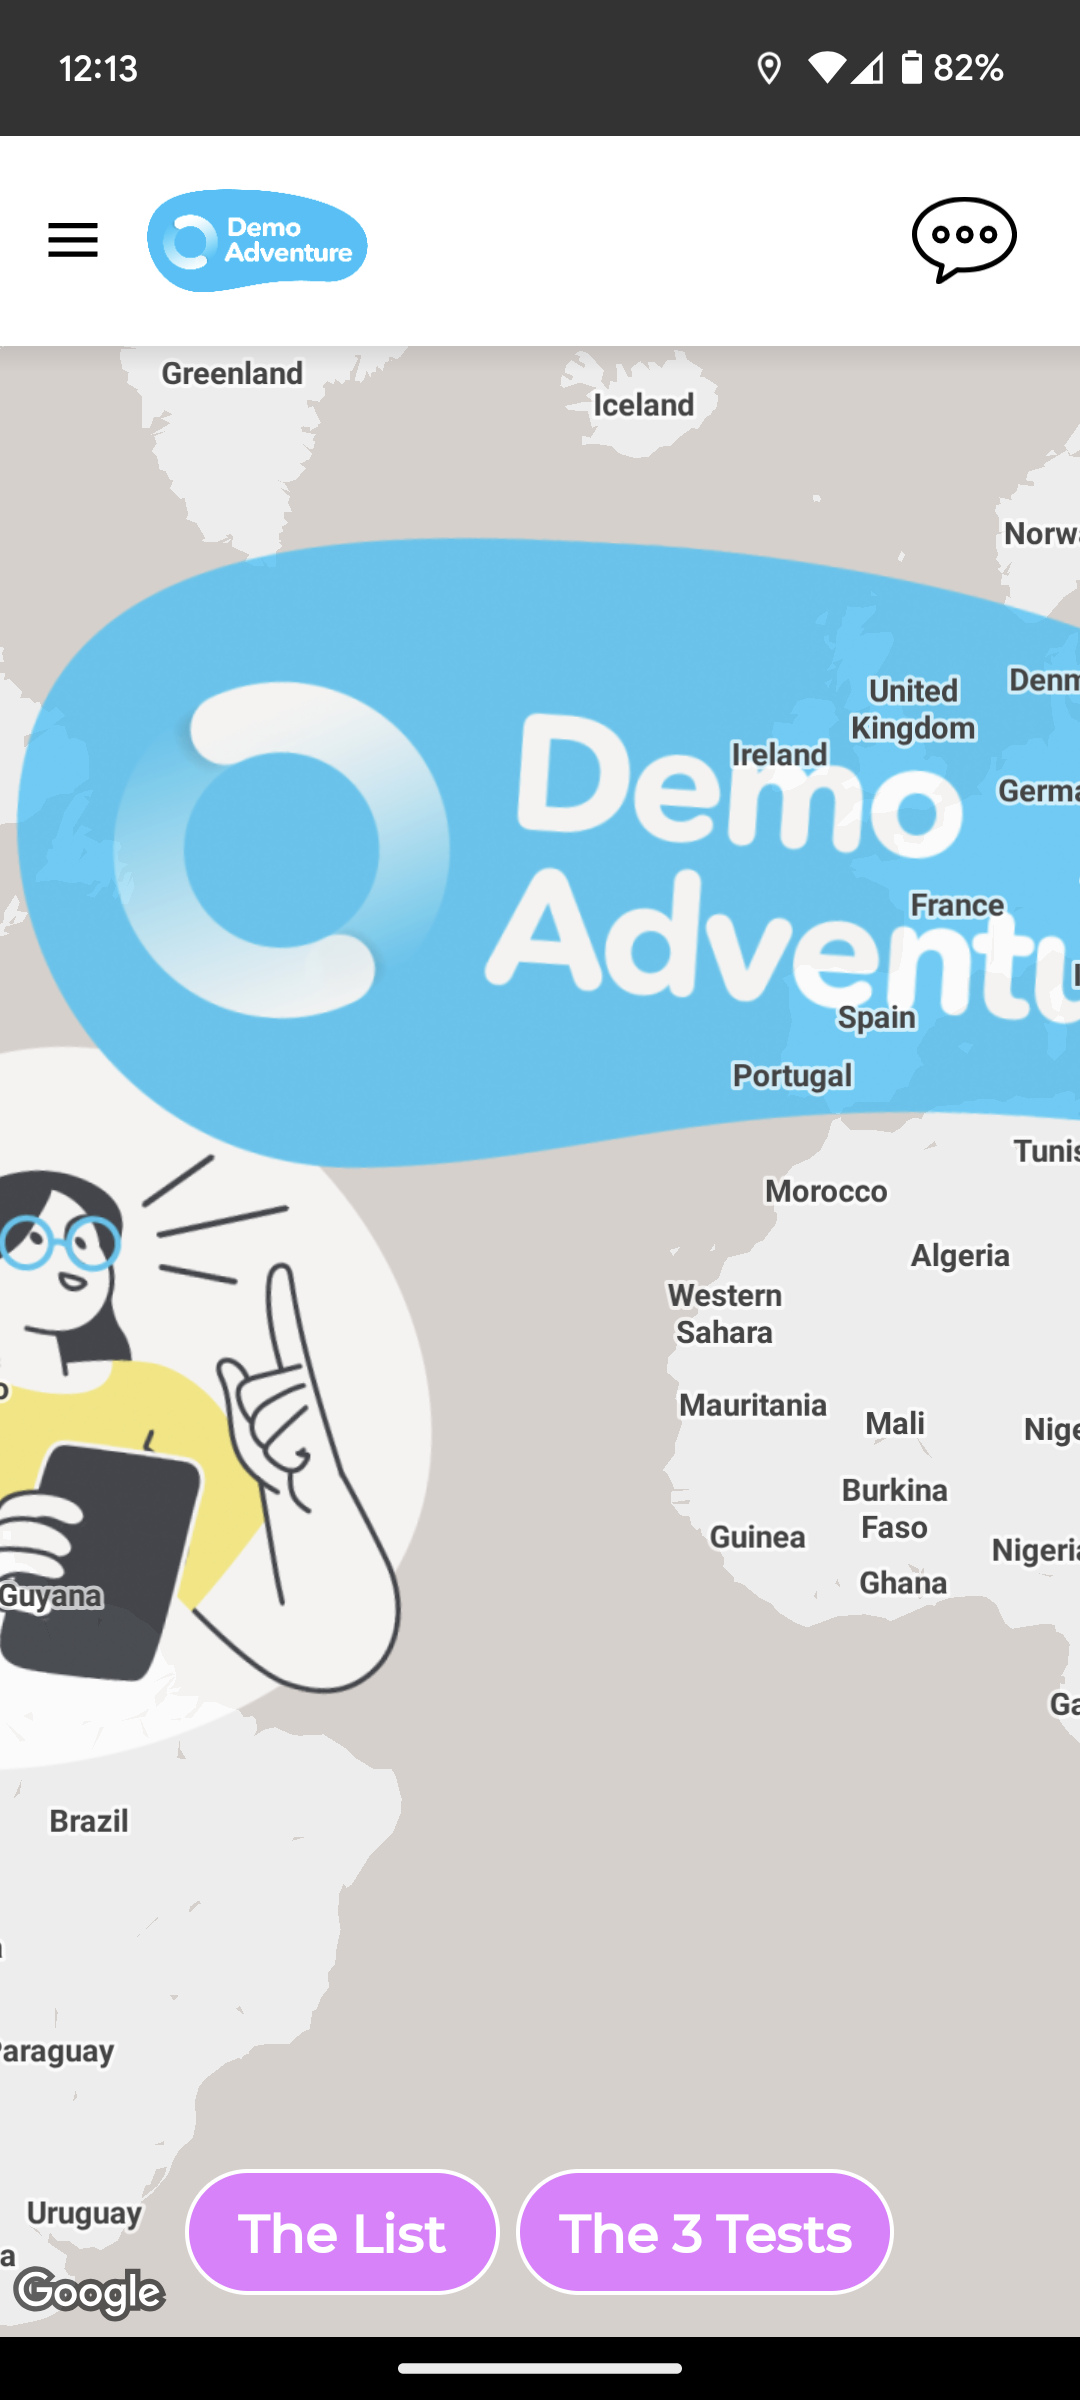
In a mobile device, you will see the picture overlay as a layer above the base map. It will be presented with location, size, rotation and transparency set within game creating/editing screen.
Picture overlay used in screenshot above is from the Demo Adventure. Here it is in photo format.


