Tour template is developed with the support from Enterprise Estonia.

Tour – outdoor game template is here to help you create smart guided tours in a city or in the nature. Game functionality allows to create the games so that tourists can easily filter the locations what they would like to visit, get provided itinerary if needed and also offers integrated navigation app in their phone.
How does the Tour game work?
How to create a game?
- Add tasks.
- Set event tags to the events.
- Set locations to the tasks that are location-specific.
- Configure game settings (game title, game logo/company logo, welcome text, finish text, language, time limit.)
Create a game and you are done!
- Add tasks
2. Event tags
- Add event tag. The Tours functionality will rely heavily on tagging, so make sure you tag your tasks and locations in a sensible manner. Event tag is extra one-time add-on tag. Could be specific for the season, customer ect. Example: Day 1, spring highlights, Day 2, spring flowers. Tags are for filtering purposes only. They are not shown to the players.
- Show on map or as a list. There are all tasks on the map by default.
3. Locations
Mark tasks to the map.
Be sure to include coordinates (under Activation) and location information. Without location, the task radius is default 0. A radius of 0 does not open itself. When a person arrives to the point, can open and read about an object by clicking on the map pin! If you want it to open automatically, please increase the radius. Keep it 10 meters or bigger so it is realistically accessible in real life.
4. Configuration
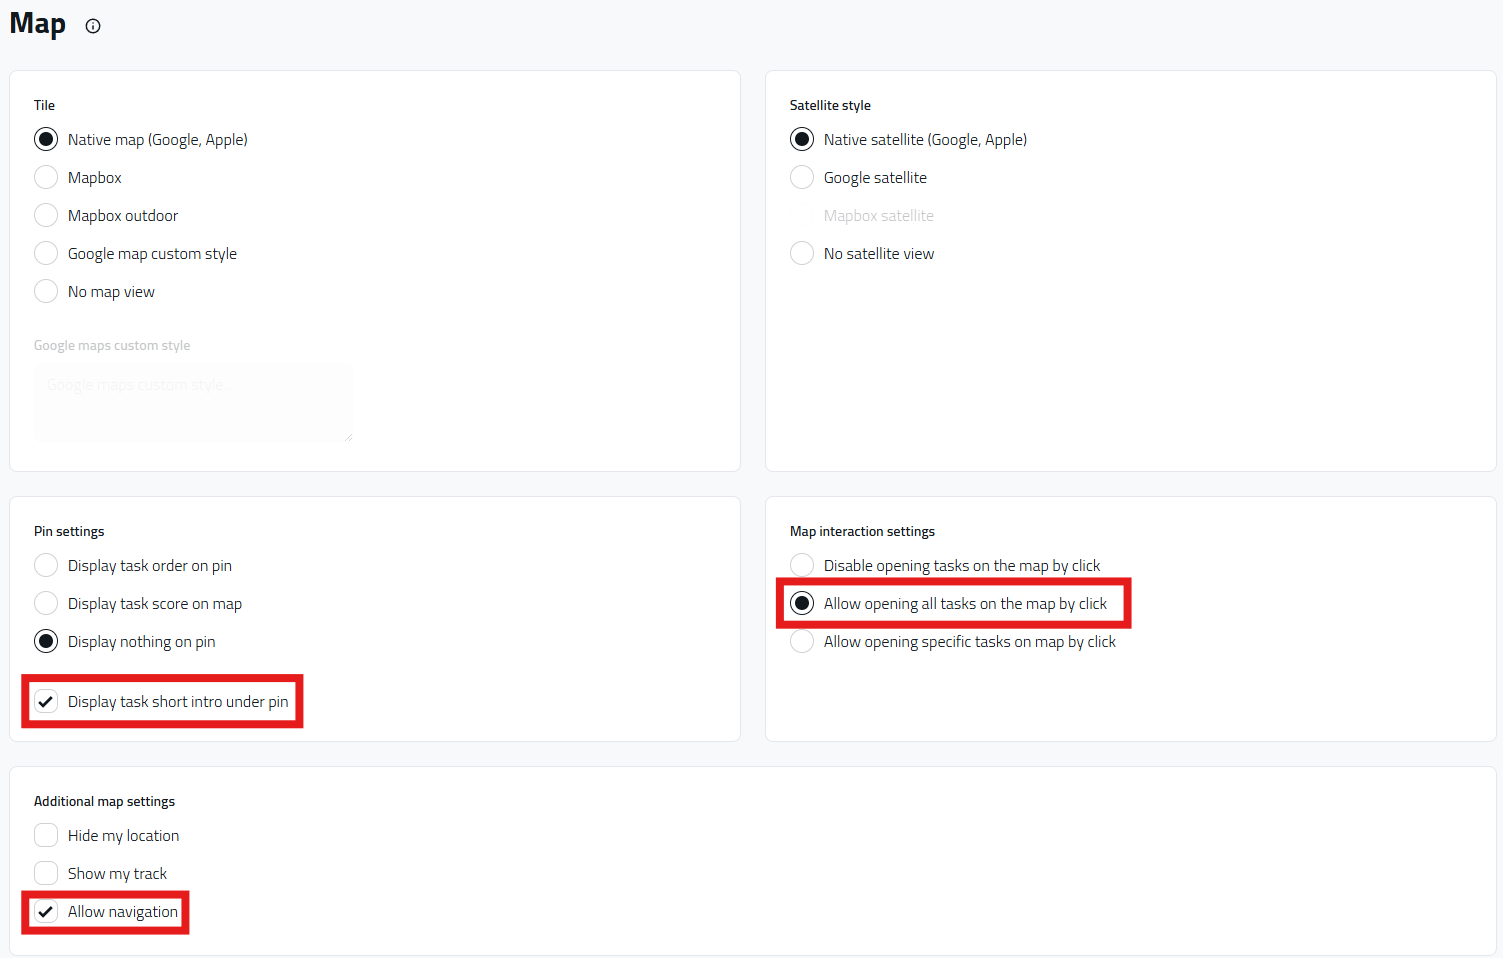
Notice that in Tour template there are several settings set as default:
⦁ Display task short intro under pin
⦁ Allow open tasks on map
⦁ Allow navigation*
⦁ Allow filtering tasks on the map by tags*
⦁ Show game time – find the feature from the game Configuration page and Design tab
⦁ Hide score – find the feature from the game Configuration page and Design tab
* Account -based features
! In Tour template there are several settings set as default:
⦁ Display task short intro under pin
⦁ Allow open tasks on map
⦁ Allow navigation*
⦁ Allow filtering tasks on the map by tags*
⦁ Hide game time
⦁ Hide score
* Account -based features
To what pay attencion:
- No answer type (under Task tab) is meant for presenting information about the location.
- Add task tags. Tags will help you to find relevant tasks later. You can add several tags to one task. For example nature, geography, brain teaser, city name, ect. The Tours functionality will rely heavily on tagging, so make sure you tag your tasks and locations in a sensible manner.
- Points value (under Task tab) – are so-called rating of the location/places (scale how good and valuable, add point as you want. 0 points are not displayed.
- Be sure to include coordinates (under Activation) and location information. Without location, the task radius is default 0. A radius of 0 does not open itself. When a person arrives to the point, can open and read about an object by clicking on the map pin! If you want it to open automatically, please increase the radius. Keep it 10 meters or bigger so it is realistically accessible in real life.
- Add Short intro (under Comments tab) – will be displayed on the map under the pin (good to show location name).
- Add Intro (under comments) – short text to describe the place, appears when clicking on the icons on the map before opening the full content.
- Creating a game with Tour template use configuration: “Keep until the end of the game”, Task can be opened repeatedly, otherwise only once!
- Add Audio guides to the Tasks if necessary. Find it under Task Media tab.
- Don`t forget to set time (ex. 60 sec.) for “Deactivate location after answering for” (under Additional settings). Then the task information is not popping up all the time when tourist is in the task location.